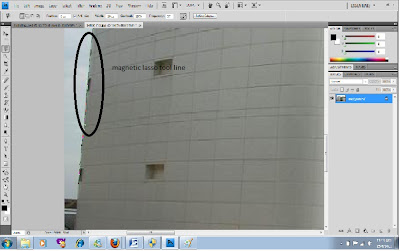
This is the entry for the selection tools for the 5 pictures. Hope you guys can understand the steps I will be explaining. Lets begin...
 |
| STEP 1: Select magnetic lasso tool from the tool panel on your left side. This tool is to detect and snaps to the edge of an object as you trace along its outline |
 |
STEP 2: Use the magnetic lasso tool and drag along the edge untill you get all the way around the object. If the selection get out of hand, press delete to undo misplaced points. until then, happy dragging until you get the selection object you desire. |
 |
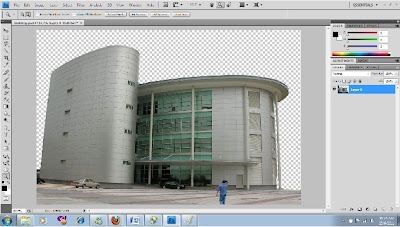
STEP 3: As you can see, this is the completed picture using the magnetic lasso tool. I also used eraser to help me detect the edge easily.
STEP 4: Do the exact step with this mascot picture using the magnetic lasso tool. Click and drag to make anchor points along the selection. Continue dragging until you get the selection you desire.
STEP 5: Use the elliptical marquee tool. Select elliptical marquee tool and start from the centre and drag out. Readjust the position by holding on the space bar while still holding down the mouse button until you get the selection into place just like the one above.
STEP 6: Open a new paper and select international paper A4 size.
STEP 7: Move all the pictures into a new A4 paper. Drag the selection pictures one by one into the A4 paper using the move tool.
|


0 Comments:
Post a Comment
Subscribe to Post Comments [Atom]
<< Home