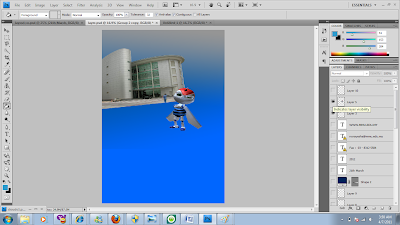
Layering:)
Hello again pretty girls and handsome boys.
Its actually very late already now. I've been staying up doing my layering work coz I kept on changing my layers everytime I work on it because my creativity ideas always changes from time to time. haih.but lets get it started:)
For background layer, I combine 3 layers to produce the desired background
 | |
| 1) Select the paint bucket tool (G then shift+G) and choose color blue. |
 |
| 2) Create new layer and click the gradient tool and just drag the mouse until the middle of the paper just like the above |
 | ||||||
| 4) I just move this two pictures from the previous selection tool that I did. But I shaped the building into the angle i want using CTRL + T |
5) I use this cloud picture as my background for the bulding just to create some impact to the building as the building has no background.
Again i just readjust the shape using Ctrl + T and move the layer behind the building so that it will look like this
6) These are the 5 photos from the selection tool excluding the cloud background. Now all of them are just being moved into the above position
7) I just create font using horizontal type tool and write what u want. u can play around with the type of font, size, color by clicking on character ( press window > character). Adjust the rotation by pressing CTRL + T
8) The arrow shown above is to indicate the shape i made using the pen tool as shown above. Select on the pen tool and start drawing the shape u want
9) And last but not least I just added the date of the event using the horizontal type tool on top of the shape i drew just now.
AND YES IM DONE. FYI, the layers can be focused by pressing on the eye button next to the layer. And u can also rearrange the position of the layers according to ur preference.


0 Comments:
Post a Comment
Subscribe to Post Comments [Atom]
<< Home